
Cultivating orchids is one of the most satisfying hobbies that one can have, especially when it comes to creative ways to display your blooming orchids. Mounting mini phalaenopsis on driftwood is an amazingly easy method to keeping your orchid healthy and it’s actually easier to grow if you are a beginner.
Mounting mini phalaenopsis is the perfect way for a beginner to get used to orchids and understand their growing habitats with a higher rate of success than if repotted in bark. It is easier to water, mist, and provide adequate humidity during the learning-curve phase.
Many new orchid growers will kill their orchid by over watering, and on a mount this doesn’t happen. Air circulation is often overlooked, but on a mount, the roots have plenty.
Let’s look at each one of these in more depth.
Mounting Mini Phalaenopsis is easier for watering
Mini Phalaenopsis are sold in the big box stores potted in highly compacted sphagnum moss. If you keep them in this potting media, it’s more than likely you will have severe root rot in a couple months. Greenhouses pack them this way because it’s easier for them to water, as they use a sprinkling system.
But once you get home, you’re instructed to water once a week, or worse, with an ice cube. Watering with ice cubes is always a bad idea, for three reasons:
1) the drastic temperature change in the water when it reaches the roots,
2) it doesn’t hydrate the entire potting medium, just where the ice cube sat, and
3) each ice cube tray has different sizes of ice cubes. A mini Phal definitely doesn’t need three…
You start your watering cycle and there are no instructions on how to water except that you need to water weekly. Since the sphagnum moss is so tightly packed, it will take a longer time for the water to penetrate the sphagnum. Yet once it does, it will not have proper air circulation and the roots will start to rot.
If you have a mini Phal that is mounted, you can water it using several methods, which I explain in this article about watering mounted orchids. But to summarize one method, a mounted orchid can be misted once in the morning and once again at night.
Mounting Mini Phalaenopsis Orchids make Root Visualization easier
One of the hardest parts of growing orchids for the beginner is to know if they are in fact watering too much or not enough. When the mini Phal is mounted, the roots will be visible. You can observe how often your watering should occur and if it is too much or not enough.
By being able to see the exposed roots, you can easily spot problems early on. When potted in vases or even plastic pots, observing the roots in mini Phals is harder because there so densely packed.
Mounted Orchids Allow for More Air Circulation
When on a mount, the orchid more naturally mimics its natural habitat in nature.
Most orchids are epiphytes (grow on trees) in the tropical and sub-tropical rainforests, so they don’t need soil.
They also are more exposed to wind currents, where after a long, hard but refreshing rain, the roots can properly air dry. In pots, this is extremely harder to achieve. Which potting medium is the best? Is the PH correct? How do you prevent root rot, crown rot, and stem root? What pests and insects lurk inside the media?
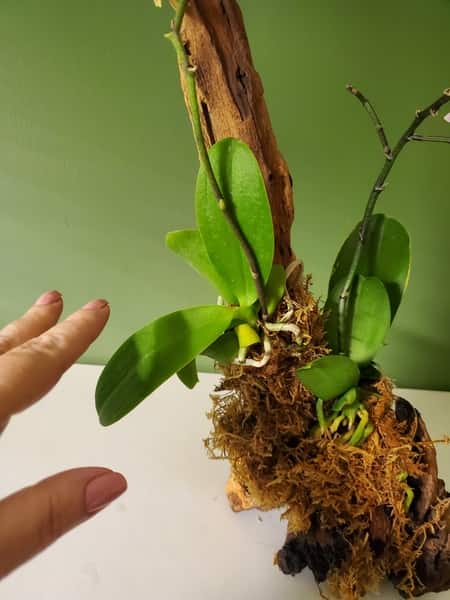
On a mount, the orchid will attach itself to the bark, cork, driftwood, or other material that you have. The roots will be more secure and the orchid can properly use its energy to focus on leave production and flower blossoms.
In other media that you have to change every two to three years, the orchid gets stunned, and its growth is temporarily halted for a few days until it has time to re-adapt to the potting media again.
Once on a mount, the orchid can stay there until it outgrows the mount, which could be decades.
What are the best orchids to mount?
If you are a beginner grower, start with the mini Phalaenopsis, since it is the easiest and probably most accessible. The bigger the orchid, the harder it is to mount. Also, from an economical point of view, if you only spent 6 to 8 dollars on a mini Phal, if things don’t go well, it’s not the end of the world. After all, a learning curve is required to cultivating orchids properly.
The bigger the roots, the harder to mount on driftwood. If you are using other material, like a hanging basket, cork, bark, or o larger slab of wood, then larger orchids will do better.
As for this tutorial, if you’re starting off, begin with a mini Phalaenopsis. In my opinion, they are the best since their size is proportional to most pieces of driftwood. Once you get the hang of it and want to try some more on logs, bark, and more natural settings, keep to the miniature orchids. In this article, I picked out the best orchids to keep in Terrariums, and they are all miniatures.
Materials Used to Mount a Mini Phalaenopsis on Driftwood
For this part of the tutorial, you’ll need to gather all the elements in the list below and let the driftwood soak overnight in a bucket of water. Sphagnum moss also needs to be soaked, but not for that long. 2 hours will be plenty. Anything under 30 minutes for new Sphagnum Moss will not work.
Materials:
One mini orchid, but three or four are actually prettier mounted together
One larger piece of driftwood, usually available at your pet store in the aquarium department. Tips: if your orchid has darker flowers, like deep purple and hot pink, pick a darker piece of driftwood. Lighter blossoms like soft, pastel-colored yellow and light, angel-colored pink look better on light pale driftwood.
If you want to use a piece of wood you found, you’ll need to boil it in water for two hours, then let it soak overnight. You never know what bacteria, viruses, pests, and other living components tag along on that piece of wood, and orchids are more sensitive when it comes to virus. If you want to see why the concern with viruses, check out this article about Ringspot Virus and how devastating it can be to your orchid.
You can also bake it in the oven to rid any insects, pests, and other creatures. Depending on the size of your wood, 2-12 hours is the average at 200ᵒ-215ᵒ F. Again, this obviously depends on how big your wood is. On a personal note, I’ve never been secure enough to bake my wood, so I boil it.
Sphagnum Moss: Make sure you don’t pick up Peat moss at the store. This will not work. You can get Spanish moss for creativity, but don’t use it as a humidifying media. Spanish moss only works as extra to get the look. If you were mounting a Vanda in a hanging basket, then Spanish moss would be perfect, since it enhances the roots humidity. But not for driftwood mounts with mini Phals. Focus strictly on Sphagnum moss, and if it’s from New Zealand, the better.
Fishing line: You’ll need high quality wire to wrap your orchid and secure it in place. Fishing line doesn’t degrade and makes a transparent finish that sets the tone. But if you are going for a more creative look, you can use thread, floral wire, twine, yarn or anything to fixate the orchid onto the wire. Whatever you use, note that it will need to come off in a few years, so if it’s biodegradable, make sure it will last long enough until the roots attach themselves to the driftwood. You don’t want to use a material that will degrade with the fifth watering, and your orchid plop off onto the ground.
Extra material that may or may not be required:
Depending on how your rot system is when you repot, you might need a few extra materials. It’s better to provide these before you start just to make sure that you don’t halt your mounting process mid-way.
Cutting shears
Cinnamon
Hydrogen Peroxide
How to Mount a Mini Phalaenopsis on Driftwood
1)Soak the driftwood and sphagnum moss. If you haven’t placed you sphagnum moss in water the night before, start with this step. Using a basket, bucket or bin, place a fistful-size of sphagnum moss in the water. If you soaked it, and it still is in water, you can proceed to step 2.
2)Unpot your Mini Phalaenopsis. To make this part easier, you should soak the entire pot in warm water for two hours prior to unpotting.
If you acquired this orchid recently, or haven’t repotted it before, it will be potted in a thick, compact mold of sphagnum moss.
This layer will have two characteristics, depending on how it was potted.
Either it will stick to the roots with a passion, making cleaning the roots hard, or it will break off in two clumps, or molds, and easily crumble away from the roots.
Either way, you need to clean all the potting media off the roots, so nothing is left over.
3)Clean the roots. Now is the time to look over your root system and check of any roots that are black, brown, mushy, or present signs of pests or mold.
Take each root and carefully examine it, looking for roots that could later on present a problem. Sometimes the root has been squished and is visibly brown, but below it is green again. Keep these, since the green is a sign that there is chlorophyll present and absorption is still working.
4)Arrange the roots on the driftwood. Before you start your actual mount, play around with the orchid on the driftwood in several locations.
If possible, angle the orchid off to a distinct side, and not straight up vertically. This will aid in watering later on.
Sometimes the orchid looks best in a place that we haven’t initially thought of. Test, play around, and experiment. Find out what position is best on the mount.
Place half the roots off to the left, and another to the right, to see what the roots have to hold on to in the future. Do this for various places, until you find the perfect spot aesthetically.
5)Prepare the wire. Cut off a piece of fishing line that can easily go around the driftwood about 6 to 7 times and still have room to tie a knot.
6)Place a few strands of sphagnum on the driftwood. This step is optional, and I don’t recommend it.
In fact, I hate this step.
I only include it because I have seen so many other tutorials that add sphagnum, that they might know something I don’t. But, if you want to, add a tiny layer of sphagnum moss on the driftwood, to form a padding for your orchid.
Why I don’t do this? Because sphagnum will deteriorate within two years.
The roots will be inclined to attach themselves to the sphagnum and not the driftwood. When it deteriorates, your orchid could fall right off the mount. There is no real reason to add this layer, just out of pure lack of knowledge, thinking you might be doing the orchid a favor.
If at all possible, avoid this step.
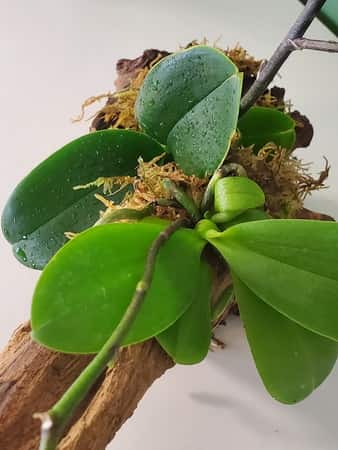
7) Arrange the orchid on the driftwood. This is the final placement. Wrap the roots firmly around the driftwood and make sure all the roots are in contact with the mount.
8)Add a layer of sphagnum moss. This is to act as a layer of protection and extra humidity. This moss is what you will be misting in the future, so this layer needs to surround the roots, but not smother them.
If at possible, leave a few root tips out of the sphagnum, so you can see how healthy they are.
Don’t place sphagnum moss near the stem. Leave about an inch or two of space around the crown to prevent any chances of stem root.
9)Tie everything in place. With the wire, wrap the orchid several times, using enough force to make sure it isn’t wobbly.
Orchids like to be firm in their pots, and potting media needs to be tight.
On the mount, there isn’t an exception. Tie the orchid down only touching the sphagnum, and never placing a wire on a bare root.
10)Knot it, and you’re done.
These steps make the perfect mount, and to water it, you’ll need to mist it once in the morning, and again in the mid-afternoon. Avoid misting at night, since air circulation and temperatures are usually lower. Too much humidity will damage your orchid.
If you mount in small, you can water the entire mount in the bathroom sink, bathtub, or kitchen. Run water over it avoiding the crown, as you would during your regular watering.
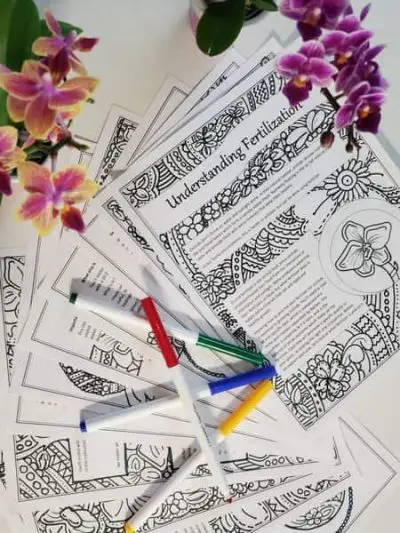
Mounted Phalaenopsis will tend to dry out faster than your other orchids. So always keep an eye out for them. You’ll nee dot keep fertilization on the same schedule you had previously, but it might be better if you used a form that could be applied while misting. Talking about fertilization, check out this free guide about fertilization.
Don’t Stop Learning!
If you want to be included in more information and get a 14-page fertilization guide, please sign up for my newsletter. I don’t spam, but send emails out bi-monthly with some curious topics of interest. If you want more information, click here to go to a specific page on this website where I explain it more in detail.
Also, if you are looking for an orchid journal to keep your notes specifically about orchid care, check out my 2 solutions for that on this page. If note-keeping isn’t your thing, then there is a free excel spreadsheet that you can download. Click here for more information on how to do that.
If you subscribe to my newsletter, I will send you a 14-page guide on the main tips of orchid fertilizer. It is downloadable and you can print it out on your computer. I designed the guide to double up as a coloring book, just to make it fun.
I hope you had fun with your mounted Phalaenopsis. Leave a comment in the box below and if possible, send pictures! 😊
Happy Cultivating!

Doesn’t the driftwood rot eventually?
Hi Inara,
I think eventually it would, one day in the very future. Driftwood is hard wood, usually from the tropics, so it’s used to being in high humidity environments. The moisture doesn’t affect it as much. On the other hand, if you collect driftwood from a river or other areas, then this might be different.
-Amanda