Watering is one of the biggest problems in orchid care. Finding the right balance can be challenging, as too much water can lead to root rot, edema, bacterial growth, and fungal infestations like mold. On the other hand, too little water can result in dehydrated roots, wrinkled leaves, and weak flower stems. It’s crucial to understand the proper techniques for watering orchids to ensure their health and longevity.
In this article, I will discuss five different methods for watering orchids. Each method has its own advantages and considerations, and I will explain why some methods are more effective than others. Some methods I condone entirely. By understanding these techniques, you will be able to provide your orchids with the optimal amount of water they need to thrive.
1) In the Sink (One of the Best Methods)
To properly water your orchids, one effective method is to use the sink. This method allows for thorough watering while ensuring the roots receive the necessary hydration.
Start by taking your orchid to the sink and positioning it under running water. Allow the water to flow through the pot and over the roots for a few minutes. This ensures that the water reaches all parts of the potting medium and thoroughly saturates the roots.
Give the pot a litlle quarter-turn every few seconds so the entire potting media gets watered (all angles). Leave the orchid under the sink for a considerable amount of time, beter too long than too little. Give the pot four to five entire turns as you water form all angles. Remember: orchids are mainly tropical plants and when it rains in tropical climates, it really pours. Nature doesn’t hold back. As long as you have adequate air circulation in your growing space and your media isn’t too compact (as it shouldn’t be) then this method is the best.
As you water your orchid in the sink, you should notice the roots turning green. This is a positive sign, indicating that the roots are absorbing the water and nutrients they need to thrive. It’s important to note that if the roots are brown or mushy, it may be a sign of overwatering or root rot, and adjustments to your watering routine may be necessary.
During the watering process, it’s crucial to ensure that the water exits the pot freely. This helps to prevent water from pooling at the bottom of the pot, which can lead to root rot and other issues. If the water is not draining properly, you may need to adjust the potting medium or consider repotting your orchid.
CONS: When using the sink method, it’s advisable to avoid using tap water. Tap water often contains chemicals such as chlorine and fluoride, which can be harmful to orchids. Instead, opt for filtered or distilled water, or allow tap water to sit out overnight to allow the chlorine to dissipate. This helps to provide your orchids with clean, pure water that won’t harm their delicate roots. To know more about this, read this article I wrote about the best water for your orchids.
By using the sink method to water your orchids, you can ensure that they receive the proper amount of water and nutrients they need to thrive. Remember to observe the roots, ensure proper drainage, water from all surface area, and use clean water to promote healthy growth and vibrant blooms. Incorporating this method into your orchid care routine will help you maintain healthy, happy plants.

2) Dunking in a Bucket (Not Recommended)
Dunking your orchid in a bucket of water or filling up your bathtub may seem like a convenient way to water your plants, but it is not recommended for several reasons. Firstly, this method is not suitable for big collections of orchids as it can be time-consuming and impractical to individually dunk each plant. Additionally, if you have sick orchids or orchids planted in different potting media, dunking them together can increase the risk of spreading bacterial infestations.
Dunking your orchid involves submerging the entire plant, including the leaves (not the flowers), in water for a few seconds up to a minute. While this method may provide temporary hydration, it does not allow for proper drainage and can lead to waterlogged roots. Orchids are epiphytes, meaning they naturally grow on other plants and have adapted to absorb water and nutrients from the air and rain. They aren’t made to sit in buckets of water for long periods of time.
Furthermore, dunking your orchid in a bucket or bathtub does not provide an accurate measure of how much water the plant is receiving. Different orchid species have varying water requirements, and it is important to tailor your watering routine to each individual plant. By using the dunking method, you may inadvertently overwater or underwater your orchids, leading to stress and potential damage.
To ensure the health and vitality of your orchids, it is best to avoid dunking them in a bucket or bathtub. Instead, opt for a watering method that allows for proper drainage and mimics their natural habitat.
3) Misting (Not Recommended)
Misting is a commonly used but not recommended method for watering orchids. While misting can be beneficial for humidity control, it is not effective for providing proper hydration to the roots of the orchids. When you mist your orchids, water droplets accumulate on the leaves, which can lead to the development of black spots. This can be detrimental to the overall health of the plant.
One of the main drawbacks of misting is that it does not directly hydrate the roots of the orchids. Orchids are epiphytes, which means they naturally absorb water and nutrients from the air and rain. Misting only provides moisture to the leaves and not to the roots, which are the main source of water absorption for the plant. Without proper hydration of the roots, the orchids may become dehydrated and suffer from stress.
In addition to the lack of root hydration, misting can also create a humid environment that is conducive to the growth of fungal and bacterial diseases. The water droplets that accumulate on the leaves can create a breeding ground for pathogens, leading to the development of diseases that can harm the orchids.
You need a mister, but not as a watering method. In this article, I go over the best humidifier (that I usea as misters) and why you should incorporate them into your collection.
To ensure the health and well-being of your orchids, it is best to avoid misting as a watering method. Instead, focus on providing proper hydration to the roots through other recommended methods, such as pouring water directly onto the potting media or using the top-down watering technique. These methods allow for better control of water absorption and drainage, reducing the risk of overwatering or underwatering the orchids.

4) Pouring Water On Each Orchid From the Top (Best method)
Pouring distilled or raind water on each orchid individually from the top of the media is considered the best method for watering orchids. This technique involves filling up a water can or tea kettle with rain water, well water, or distilled water. It is important to use water that is free from chemicals or impurities that can harm the orchids.
To water the orchids, place the spout of the water can or tea kettle under the leaf of the plant, not on top. This allows the water to directly reach the potting media and the roots of the orchid. It is crucial to drench the media thoroughly to ensure that all parts of the roots receive adequate hydration.
One of the main advantages of pouring water from the top is that it helps prevent the spreading of diseases. By avoiding direct contact with the leaves, this method minimizes the risk of water droplets accumulating on the foliage, which can create a humid environment ideal for the growth of fungal and bacterial diseases.
When using this method, it is recommended to be specific with the amount of water used. Measure the water in milliliters and adjust the quantity based on the size of the orchid and its pot. Smaller orchids may require less water, while larger ones may need more, but this is more dependant on your potting media. If you use a lot of spahgnummoss, then you won’t need as much water. If you use a lot of gravel, charcoal, or large grade media, then you need to water for a little longer. In this article I wrote called “How Often Should you water a Phalaenopsis Orchid”, I explain this concept a little more. This precision ensures that each orchid receives the appropriate amount of hydration without the risk of overwatering or underwatering.
It is important to note that this method can be time-consuming, especially if you have a large collection of orchids. However, the benefits of preventing disease spreading and providing targeted hydration to the roots make it worth the effort.
5) Rinsing down with a hose outdoors
If you have a more powerful mister that acts like an outdoor hose, rinsing down with a hose outdoors can be a refreshing way to water your orchids. Similar to giving them a bath, this method allows you to thoroughly rinse the leaves, crown, stem, and potting media.
It is a popular myth that by leting your orchid get wet in the crown area will immediatly cause crown rot. Orchids (most of them) gorw in jungles and it pours down heavily, getting the entire orchid drenched. They actually live well when watered like this. The main difference is that in the rainforest and jungles, it is extremely hot and air currents are pretty strong, so all that water evaporates quickly. Contrary to your home office, if there isn’t a fan or some form of air circulation, than your orchid coudl very well be prone to crown rot. This article I wrote is about Black Rot, but Crown Rot is very similar in the way it starts.
Drenchind an orchid outside with the hose is particularly beneficial during the summer months, when orchids may benefit from a deep watering once a month. However, it is important to note that this method is not suitable for frequent watering, such as three times a week, as it can lead to overwatering.
During the winter months, it is best to avoid rinsing down with a hose outdoors altogether. The cold temperatures can shock the orchids and potentially damage their delicate roots and foliage. Instead, opt for other watering methods that are more suitable for the winter season.
Additionally, it is important to mention that using ice cubes on your orchids is not recommended. While some may believe that ice cubes provide a slow release of water, they can actually cause temperature fluctuations that can harm the orchids. Stick to using room temperature water for watering your orchids.
Other Methods Not Included
I won’t go over the semi-hydroponic or hydroponic way of watering orchids because those are separte in themselves. Their entire growing system is dependant on the watering, so I will just link to articles that I wrote about them. Semi-hydroponics and Full Hydroponics
 . I also have a few videos about that too.
Another consideration about watering orchids is if you have a mounted orchid. On a mount, orchids will dry out much faster than anywhere else. They need to be watered almost daily (if you live in a dry area) or every other day. This article I wrote has more info specificall y about watering mounted orchids.
7 Extra Tips for Watering:
I can’t jut leave the article and say that’s enough… I have to leave some tips about watering orchids too, that can help ensure their health and vitality. Here are seven additional tips to keep in mind:
1. Let the potting media dry: It’s important to only water your orchid when the potting media has dried completely. This helps prevent overwatering and root rot, which can be detrimental to the plant’s overall health.
2. Water at the right time: To give your orchids ample time to dry before cooler evening temperatures set in, it’s best to water them early in the morning. This allows the excess moisture to evaporate throughout the day.
3. Check the potting mix: If the potting mix looks dry and dusty, it’s a good indication that it’s time to water your orchid. However, be sure to avoid watering too frequently, as this can lead to waterlogged roots.
4. Consider your climate: The frequency of watering orchids is influenced by the level of humidity in your climate, as well as the amount of sunlight and temperature. Take these factors into account when determining how often to water your orchids.
5. Lift the pot to check its weight: A simple way to determine if your orchid needs watering is by lifting the pot. If it feels lighter than usual, it’s a sign that the plant is ready for a drink.
6. Use a pebble tray: Creating a pebble tray can help increase humidity around your orchids. Fill a pan with water halfway up the sides of the gravel and place the orchid pot on top. As the water naturally evaporates, it will provide a gentle source of moisture for the plant. I have an entire article aout pebble trays (humidity trays) that you can read here .
.
7. Use room temperature water: When watering your orchids, it’s best to use room temperature water. Regular tap water is suitable, as long as it hasn’t been softened with salts. Avoid using cold water, as it can shock the plant’s delicate roots. I did an in-depth study about the ice-cube method (and also a video).
By following these extra tips, you can ensure that your orchids receive the proper care and watering they need to thrive.
Don’t Stop Learning!
If you want to be included in more information and get a 14-page fertilization guide, please sign up for my newsletter. I don’t spam, but send emails out bi-monthly with some curious topics of interest. If you want more information, click here to go to a specific page on this website where I explain it more in detail.

Also, if you are looking for an orchid journal to keep your notes specifically about orchid care, check out my 2 solutions for that on this page. If note-keeping isn’t your thing, then there is a free excel spreadsheet that you can download. Click here for more information on how to do that.
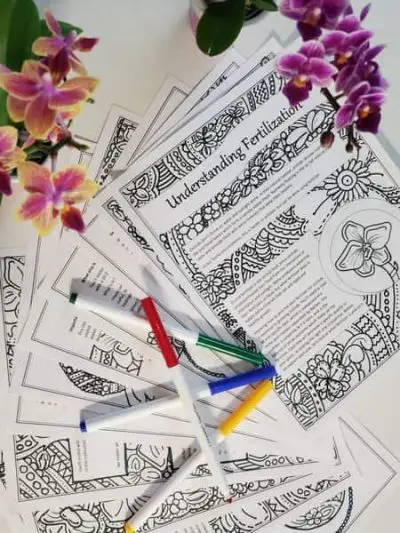
If you subscribe to my newsletter, I will send you a 14-page guide on the main tips of orchid fertilizer. It is downloadable and you can print it out on your computer. I designed the guide to double up as a coloring book, just to make it fun.


Hi Amanda! My name is Laura, and I’m from Brazil. I started growing orchids two years ago during a challenging time in my life. My orchids became my companions, helping me reflect and find peace after meditating. Your website is fantastic—it’s the most comprehensive one I’ve ever encountered. Thank you so much! I’ve learned a lot from your work.
Hi Laura! That’s amazing! Where in Brazil are you – what state?