One commonly used potting medium for orchids is tree bark. With its low cost and easy accessibility, bark—fir bark, more specifically—is one of the most used potting media, only losing rank to leca pebbles.
When it comes to drainage, orchid bark is excellent as a potting medium for orchids. Either fine-grade or coarse grade orchid bark provides quick drainage that allows the orchid roots to receive adequate amounts of water but still dry out quickly. Orchid roots become less water-saturated, minimizing the possibility of root rot.
Whether Fir bark, Douglas bark, or Pine bark, it doesn’t really matter when it comes to orchids. The only bark I recommend staying away from is Redwood bark. It’s not that common now anyway, since a vast majority of the redwood has sadly been depleted from the landscape…and because it contains toxins that can be harmful to household pets.
All other kinds of bark inside the potting medium are widely accepted when it comes to orchid bark.
Is Orchid Bark or Sphagnum Moss Better for Drainage?
Sphagnum moss retains up to 10x its dry weight in water. Better (more expensive) brands from New Zealand or Chile can retain up to 20x. The moss slowly releases the water over a period of several days.
In comparison, Orchid bark doesn’t retain that much water. It can absorb some, but for the most part, the orchid bark will become wet and dry out within a few hours. If you have a fan on and good airflow, then it can dry out sooner.
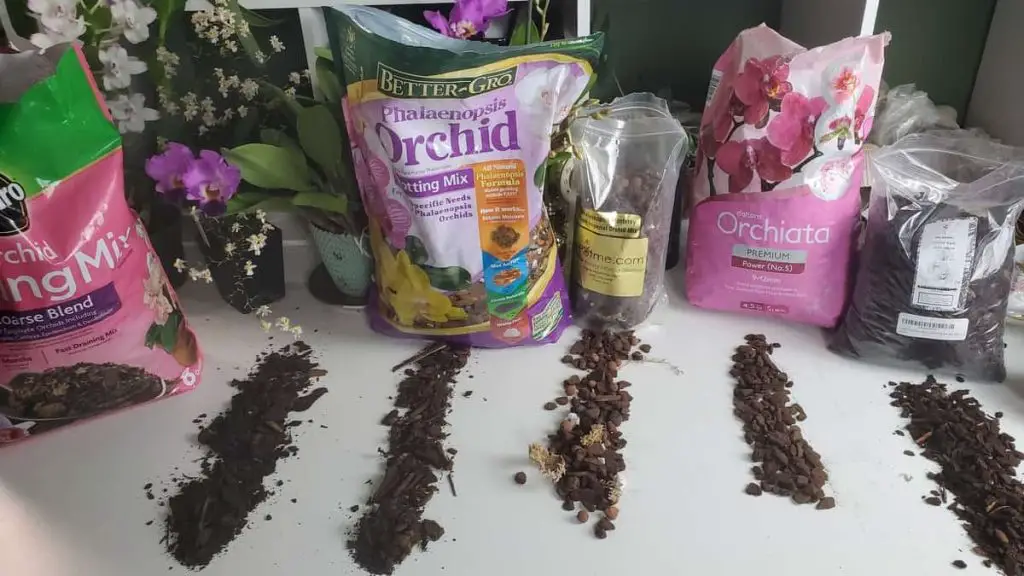
By themselves, neither bark and sphagnum moss are a good potting medium when it comes to drainage. This is my opinion only.
I have seen wonderful growers do well in both, but in my home office, they either rot away in the sphagnum moss or dehydrate, making me water every day.
I say this because orchid bark will drain more, but just orchid bark drains too fast.
When aiming for a potting medium, you need to select one that will do two things: (1) drain well, and (2) retain water well. Both bark and moss focus on only one aspect of potting medium, but neglect the other.
Drainage is your main goal with bark: you want a potting media that will allow a quick exit for water to enter and leave the potting media quickly. Any water that sits around will attract fungus, mold, and bacteria.
Sphagnum moss will act as a water absorbent. Not only water, but moss will attract and absorb any nutrients that the potting medium offers… So go slow on the fertilizer.
Even though these two are opposites, bark and sphagnum, they act as opposing forces which keeps the orchid alive and in perfect balance/harmony. When mixed together, sphagnum moss and bark are a great combination.
A good balance of 5:1 of bark to sphagnum moss is the ideal to keep drainage and still be moist. If you want to read more about sphagnum moss as a potting media, click on this article.
Can Mulch be Used for Orchids?
Mulch is used as a substitute for pine bark or fir bark, and some have successfully grown orchids in it. There are several downfalls to this, though, and in my opinion, should be avoided if possible.
Mulch is not as smooth to the touch, having more splinters, powder, and brittle wood. But the main cause for avoiding mulch in potting mix is that it usually is made of a softer wood, like pine, and will degrade faster.
Orchids do not like to be repotted. The less, the better. But with the softer pine wood mulch, you’ll have to repot yearly.
If you want more information on the pros and cons of using mulch in the place of orchid bark, read this article I wrote.
What Grade of Orchid Bark to Use: Fine or Coarse?
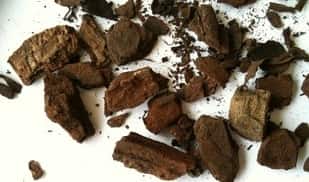
The bigger the orchid medium, the faster it will drain. The smaller, the longer water has to travel the creaks and crannies of the enlarged surface area. Before you buy huge chunks of fir bark, you also need to pick one that is adequately sized to the orchid’s roots.
If you have a small seedling orchid, opt for smaller grade bark, with tons more sphagnum moss than bark. If your orchid is older or has huge, thick roots, you can choose a larger grade bark.
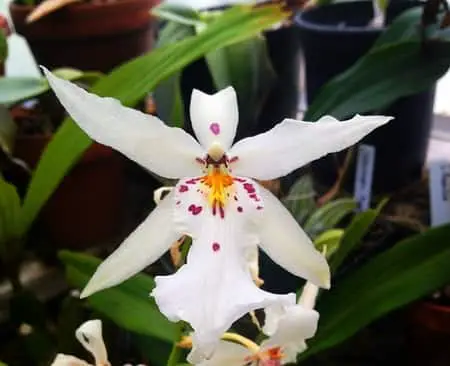
 Fine-Grade: If your orchid is one that loves humidity and loves to be watered, use finer grade fir bark. Some examples are: Dendrobiums, Vandas, Tolumnias, and Oncidiums.Coarse-Grade: If your orchid has to have the specific drying out periods, feeling the necessity to keep its roots dry before the next watering, use a thicker or larger grade bark. These higher moisture-loving “yet need-a-longer-drying-out-period” orchids include: Cymbidiums, Miltonias, Miltoniopsis, Paphiopedilums, Phalaenopsis, etc.
Intermediate-Grade: For those orchids, which are neither/nor, or fit in between these, like Cattleya, Oncidium, and Odontoglossum, use an intermediate grade bark.
What Fertilizer do I use with Orchid Bark?
Fir bark has a high propensity to house bacteria, and these little guys like to hog all the nitrogen. You can attempt to fulfill the nitrogen demands by doing several different things.
Fir bark does tend to have a lower pH, ranging from 4.0 to 5.0. Whatever you can do to raise that, is also beneficial to your orchid. You’ll have to see what is available in your area and ask for specific uses of each one. In general, though, you’ll want to:
(1) Use a fertilizer that is high in nitrogen (the first number in the N-P-K ratio). Buy a fertilizer that is 30-10-10, for example. The downside to this is that high-nitrogen releases high doses of urea, and that kills an orchid, too. The pH is slightly changed with the higher doses of nitrogen, which isn’t good either. That should supply the orchid and your hostile invasion of trespassers with enough nitrogen to thrive. Obviously, this solution has its ups and downs and is a bit controversial.
(2) Use a balanced fertilizer, 10-10-10 but keep the orchid in a higher ventilated place, where the nitrogen in the circulating air will be more accessible to the orchid.
Repotting with Orchid Bark to Guarantee Good Drainage
One orchid that responds extremely well to bark is the Phalaenopsis orchid. Cattleyas, Brassavolas, and Dendrobiums also do excellent with orchid bark. One of the other reasons fir bark has been so popularly accepted is it’s easy to use when repotting. With fir bark, you’ll need to repot your orchid every two years; never leaving the bark longer than that.
To repot with orchid bark, you’ll need:
Gloves
Scissors (sterilized)
New pot, about 2inches wider than the previous pot*
Fir bark
Sphagnum moss (optional)
Drainage material for the bottom (optional)
Steps:
1) On the night before, put your fir bark into a bucket with water. Let it soak overnight. Sometimes, fir bark is kept in storage a long time and has a hard time retaining water in the beginning. It needs a little extra shove in order to absorb properly. Soaking will also remove any dust and finer particles that stuck to it during transport.
2) Decide if you are going to add sphagnum moss to the orchid potting mix. If yes, then soak this as well. You don’t need to soak this overnight; a couple hours will be sufficient.
3) Remove the orchid from the old pot. To do this, you might want to soak the orchid in warm water to loosen the roots and make them more pliable. Flexible roots will break less than rigid, hard roots that are stuck to the inside of the pot. After soaking the orchid, squeeze the pot gently to free up the roots from the sides. Do these steps carefully to not damage any velamen, which protects the roots.
4) Once the orchid is out, clean all the potting material from the roots of the old orchid. Do this slowly and take your time. If you just brought your orchid home from the store, then it’s probable and possible that it has a moss ball in the middle, directly under the roots. Dig, pick, pull, and peck at the contents to remove all the previous potting medium until it is all gone.
5) Rinse your orchid in the sink to remove and traces of old media.
6) Examine the roots. This is the time to cut off old roots that are dead. Don’t cut off roots just because they are yellow. Green roots will be green because the receive light, since they sit toward the outer portion of the pot. Yellow roots that are plump and not soggy are perfectly healthy roots, but aren’t green because they don’t have chlorophyll to perform photosynthesis. These more yellow-looking roots will be in the middle of the potting mix, far from light. Keep these on the orchid. Don’t remove aerial roots either. This article explains why and more about aerial roots.
7) Look for pests, insects, small dots or growths which could signify bacteria and fungus. If you see signs of mold, or any other infestation that shouldn’t be there, spray the orchid with hydrogen peroxide diluted with water.
8) This next step depends if you want to use sphagnum moss in your fir bark mix. I also add charcoal, but that’s just me. If you want to know the benefits of charcoal, read this article.
9) If you want to use a layer of drainage material, like pebbles, rocks, or any other barrier to keep the potting medium from leaking out the bottom of your plant, now is the time to add it. This is totally optional, and I don’t add any extra layer. I find the bark to be coarse enough (even the finer grade bark) that it doesn’t fall out of my pot.
10) Once the orchid is clean, place your monopodial orchid in the middle of the pot. Monopodial orchids are Phalaenopsis and Vandas. Sympodial orchids (Cattleyas, Oncidiums, Dendrobiums, etc) need to be placed with the oldest pseudobulb towards the edge of the pot, where new growth will be sprouting toward the middle. If these terms—monopodial, sympodial, and pseudobulbs—are confusing, check out the orchid anatomy and terminology page.
11) With one hand, hold the orchid in place, and with the other place a cupful of bark in the pot.
12) Tap the pot to force the bark to settle and fill in the empty spaces. Always shift the bark after placing cups of bark in the pot. Don’t wait to tap the pot when all the bark is in the pot.
13) Fill. Tap. Repeat.
14) Once the orchid pot is full of bark, press down tightly. Bark needs to be firmly in place. If you can pick the orchid up by the leaves and it not fall out of the pot, then you have a successfully potted plant. Many people think that pressing down on the orchid will hurt it, but orchids like to be tightly compacted in their potting mix. Since you have not used any water retaining material, except maybe a handful of sphagnum moss, then you’ll need to do some extra compressing to make sure the bark is touching against the roots. If not, the roots will be too exposed to air and your orchid will dehydrate even with constant watering.
15) Water your orchid one final time. This is to test the potting medium and its drainage. It should drain fast and reach all the roots. Once done, place your orchid in a location where it gets lots of light and has plenty of air circulation to dry out. The next watering will be a little longer, since the bark still has plenty of humidity absorbed in it, so keep an eye out for the next five to twelve days.
Don’t Stop Learning!
If you want to be included in more information and get a 14-page fertilization guide, please sign up for my newsletter. I don’t spam, but send emails out bi-monthly with some curious topics of interest. If you want more information, click here to go to a specific page on this website where I explain it more in detail.

Also, if you are looking for an orchid journal to keep your notes specifically about orchid care, check out my 2 solutions for that on this page. If note-keeping isn’t your thing, then there is a free excel spreadsheet that you can download. Click here for more information on how to do that.
If you subscribe to my newsletter, I will send you a 14-page guide on the main tips of orchid fertilizer. It is downloadable and you can print it out on your computer. I designed the guide to double up as a coloring book, just to make it fun.
Where to Buy Orchid Bark
If you need to buy orchid bark, you can try your local nursery or greenhouse. If they are out, then the following brands are the most common. As most things in life, you get what you pay for. So if at all possible, try to get one that will hold up for a long time.
After you buy the orchid bark, always open it and test it for bugs. Some brands have been known to come with all kinds of bugs. The smell will be the biggest indicator that something is wrong.
This brand also has perlite and charcoal in the orchid bark.
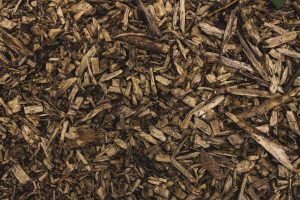
Unlike the one above, this brand doesn’t have perlite and charcoal in the orchid bark. If you’re wondering why some the pictures in this article are all of tree bark, it’s because you can use tree bark that you find around your natural habitat to use in your potting media. Make sure to bake it in the oven to sterilize it, ridding it of all harmful insects, bacteria, and fungus. Once sterilized, you can break it into smaller pieces, depending on how big or small your orchid prefers.
I hope you’ve enjoyed learning about Orchid bark. If you have any questions, comments, arguments, or just want to step in to say hello, I’d appreciate it! It’s always great to meet new friends and exchange ideas with other orchid growers.
If you grow using orchid bark, drop me a line in the comments below and tell me what kind you use: fir, pine, douglas, or another type.
Happy Cultivating!


