
Propagating orchids from cuttings and spikes seems all too common these days. I’ve seen one too many videos and articles that promise miraculous results from flower spikes and orchid stem cuttings. Just like the “orchids purify the air” or the “ice cubes are good for orchids”, some myths become true after repeating them thousands of times. The misinformation about propagating orchids from cuttings is leading to some pretty sad results. Is it true that orchids can be grown from cuttings?
Orchids can be grown from cuttings but only if the cut is done after a keiki—a new growth on the side of the Phalaenopsis flower spike or stem—has developed good roots and stems. Orchids can also be propagated through the division of back bulbs. Placing cut flower spikes without a keiki into sphagnum moss and closing the lid for one month will not induce the growth of new orchid plants.


What Doesn’t Work for Growing Orchid Cuttings
Myth-busting: There are several different ways to propagate orchids, none of which the first ranking articles are suggesting.
In the most ranking articles about growing orchids from cuttings, the host will place a cut spike into a vase with sphagnum moss, spritz with water, and wait a month. This does not work and is not real. The results they provide are spikes that already and keikis on them in the first place. A flower spike needs to be attached to the stem to have any flow of nutrients through its xylem.
It makes me so mad that these videos are actually getting reviews and ranking… It just simply can’t be done. Not on a Phalaenopsis orchid. There have been successful divisions of Dendrobium orchids that have been grown in this method, but the entire stem is placed in the sealed container.
A stem is an entirely different structure than the flower spike (inflorescence). A stem has enough nutrients to not need immediate roots that absorb water and nutrient.
That is why the stem can be placed in a vase and live long enough for new roots to be born. A flower spike has nothing of the sort. When cut, it will live a week, maximum. That is why cut Phalaenopsis spikes only last one week as an orchid centerpiece, if that.
Succulents are entirely different plants and will work with this method. If you take a succulent leaf and place it over humid sand, each individual leaf will turn into a new plant. This is not the case with orchids, who cannot supply the demand of nutrients through a cut flower spike.
To write this article, I analyzed the methods that are being presented as successful and testing each one. Each method below was either classified as a myth, a valid method, or a pending testing/research.
Again, these are my conclusions, and if you disagree, I am perfectly fine with that. The best way to learn is to talk about our experiences.
Let’s dive in!
Valid method:
Orchids Propagate by Pollination and Seed Growth
The first way to grow orchids is through seeds in sexual reproduction. When the male anther receives the female pollen from the stigma, the orchid flower withers. This happens because the flower is now working on seed formation inside the wilting flower. A seed pod will grow from the union of these male and female orchid parts.
Since I am not into seed propagation, I couldn’t start to tell you what to do. Here But Not, a website by Dustin Miller in Canada has an entire article on that and it’s really good. I suggest you read his work if pollination and seed propagation is your thing.
This method is great if you have tons of patience and time. Growing seeds into full flowering plants can take up to five years or more. It is an excellent way to learn about orchid care since it will be a full-time hands-on experience.
Growing orchids from seeds is a valid method of propagating orchids and quite fascinating, too. Some orchids, as the Catasetum orchids, have a great back story about seed germination and pollination. For that reason only, I have a few Catasetum orchids. You can read about them in these two articles: this one about the male and female Catasetum orchids, and this one about watering cycles of Catasetum.
Even though I am fascinated by their growth and seed pollination with the Euglossine bee, I have not yet tested growing seeds, and I doubt it’s something I will be doing in the future.
Valid Method:
Growing Orchids from Division Cuttings
The next method of propagating orchids is one that I find the most used in orchid care, called Back Bulb Cuttings or Natural Divisions. This is a natural way of vegetative propagation. If you have a sympodial orchid, like a Cattleya, you can divide the orchid into 2 or three plants by splitting the rhizome. (Source)
This method of stimulating new orchid growth is used in one or more situations: either your plant is too large for its pot and you don’t want to go one pot bigger, or you have a friend who wants an orchid cutting. Either way, you will be dividing the plant by cutting the rhizome into equal parts.
If you only have two divisions after cutting, then one will have the oldest back bulb on it. Look for dormant eyes, or areas that could produce new pseudobulbs. The severed rhizome will induce the back bulb to consume its nutrients in storage by producing new growth from the dormant eyes. You should see a quick shriveling of the back bulb in this method.
By leaving 3 or 4 healthy pseudobulbs on the division, each will grow perfectly fine. They have enough mature, healthy pseudobulbs to produce new growth. In some cases, growth can occur at both ends. However, most often than not, the pattern is to see the growth only at the end that is the newest.
The back bulbs are pseudobulbs that no longer are in active growth but still supply enough nutrients to the newer bulbs so they can produce growth. By dividing the rhizome with enough pseudobulbs, each orchid division has a great chance to develop into a healthy plant the size it once was.
Technically, division is just the name of the part with the lead bulb and active growth. All other parts of the orchid that are divided from this that do not have an active growth are called back bulbs. When dividing the orchid that has various new growths on the rhizome, you can have more than one division. If your rhizome is linear, then only one division can be made, and all the others are back bulbs.
This is the perfect method to use when giving an orchid to a friend who wants a piece of your orchid. The best time to divide your orchid, creating cuttings from back bulbs is right after the orchid has flowered, but before you repot it.
This is because when you repot the orchid, you have already disturbed its roots. When dividing the orchid through cuttings, you’ll have to disturb the roots again.
When dividing the rhizome, make sure to use sterilized pruners and make clean cuts. After you cut the rhizome, plant the older pseudobulb toward the outer edge of the pot. The newer growth will grow towards the center, filling the vase over two years.
Not Tested:
Propagating Orchid Cuttings Through Stem Topping
The first method of back bulbs and division only works for Sympodial orchids. It will not work on Phalaenopsis orchids because Phals do not have a rhizome. If you cut the stem of the Phal in half and try to grow the severed stem in sphagnum, it does not work.
Yet…
There is a method called topping. I have not tried it, and doubt I will. The method states that you can cut the orchid stem in half. If you have a Vanda orchid that has grown too tall, you can cut the stem into two parts, potting the top half with no roots into a pot with moist sphagnum.
I did see one video where the host used this method and snipped his Phalaenopsis orchid in two. The beautiful stem—whacked. The end results showed two new Phalaenopsis orchids, both of which were flowering. I have to admit, I was a bit stunned. Personally, I will never try this method. I just can’t imagine what would happen…
Maybe it worked well with others, but I do good just to get my orchids to flower as is. So, this method is not for me. If you have tried it, please tell me how it went in the comments below.
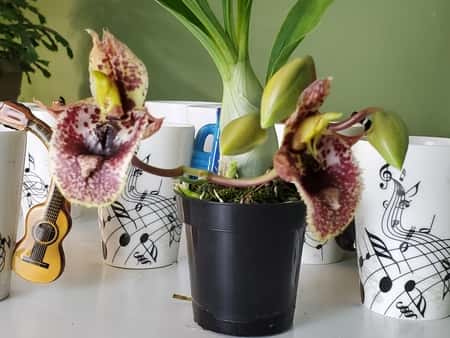
Image Credit: © 2020 Orchideria. All Rights Reserved.

Valid Method:
Propagating Orchids through Only Back Bulbs
In this method, the oldest back bulb that isn’t too shriveled or already dead is removed and planted by itself. This method is used a lot with Catasetum, Cymbidium, and Oncidium orchids. The orchid’s oldest pseudobulb hasn’t shriveled up to the point that it’s dying, yet it isn’t producing any new growth either.
If left by attached to the entire plant, there is no stimulus to produce new growth from the dormant eyes. If the pseudobulb is removed, the dormant eyes could sense that they need to get their act together and get a move in it.
The orchid then produces new growth from what would have been a “useless” pseudobulb. Ok, that wasn’t fair… It’s not useless, since it provides nutrients to the entire plant and keeps closer, active pseudobulbs alive.
When removed from the entire plant, place the old pseudobulb in moist sphagnum moss and keep in a dim place. You should mist the growth daily so the sphagnum doesn’t dry up completely.
In this method, you can also use damp sand. As long as the orchid is not laying in water but on a surface that the water will evaporate reaching the pseudobulb, the orchid will produce new roots.
Once the back bulb has the first sign of new roots, you can repot it in orchid bark, perlite, sphagnum moss, or whatever is best for your orchid. It will grow from there, producing awesome new roots and a whole new plant.
This method of propagating orchids through back bulbs is time-consuming but extremely rewarding. You take what would be a portion of the plant that otherwise would not contribute to your orchid collection and give it purpose in life.
Myth-Busted:
Propagating Orchids through Root Cuttings
I have seen numerous searches for propagating orchids with root cuttings. I even read an article where the author said that was possible. For me, I don’t find any possibility of this method working and I’ll explain why.
First, roots on orchids are not self-sustainable. Roots naturally die off and new roots grow in their place. There has not been one shred of evidence that this actually works, only a few people who say it does without providing proof. I’m kind of like Thomas—show me so I can believe.
Second, even if you cut aerial roots, the orchid takes a hit. When repotting, if you cut too many roots, the orchid suffers. So, no matter what, whenever you cut orchid roots, the area where the root was cut will shrivel and seal off. If you water too soon after cutting the roots, they will tend to develop root rot.
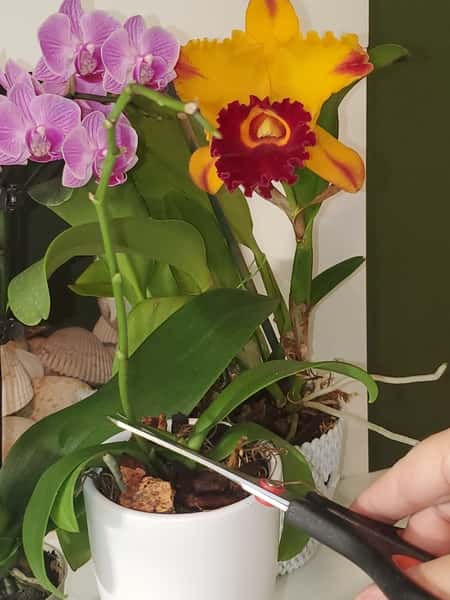
Finally, well… I have no more arguments. Crazily, I have tested this method just to see, and it simply doesn’t work. Image Credit: © 2020 Orchideria. All Rights Reserved.
Myth-Busted:
Growing Orchids through Leaf Cuttings
If you have a succulent and cut a portion o the leaf, it will grow. Orchids do not follow the same kind of pattern. I have grown an orchid with no leaves as a rescue plant, which you can read here, but an orchid that has only one leaf and then developed new roots?
This would only work if the stem was attached, too. In this case, it would not be a true propagation from one leaf, but from a stem with no roots and one leaf. The stem is where the orchid organizes all the functions of the plant. Without a healthy stem, there are no healthy roots, leaves, of flower spikes.
This is true also of stem diseases. If you have root rot, you can treat it, recovering your orchid. If you have a damaged leaf, you can cut it back or heal it with proper care. Yet if your stem has stem rot, then there is not much you can do to prevent it from spreading. The stem is not a delicate part of the orchid, but if damaged, it will not recover to the extent that other orchid structures will.
That is why propagating orchids with only just leaves is not a valid method of growing orchids. Place a stem with the leaf, then we’re going somewhere.
Not everyone agrees, and that is fine. I’m not saying I have the final word, since I am still learning also. There is a book called Micropropagation of Orchids, where the author vouches for leaf propagation. In another article, published in the Botanical Journal of the Linnean Society in 1988, they also say that propagating orchids only with leaves is possible.
I’ll cite a part of his work, where he states: “A commonly held view is that the ideas and basis for the practice of orchid micropropagation arose de novo in 1960 from the work of Georges Morel in France. In this paper we argue that the crucial developments in micropropagation were made by Gavino Rotor in 1949 in the USA and Hans Thomale in 1957 in Germany, and that Morel’s work needs to be seen in the context of a long line of research achievements in the in vitro culture of a wide range of explanted tissues and organs from plants of many species. A critical, historical, analysis of the events as they relate to clonal orchid multiplication is offered here. Two important technical innovations for orchid micropropagation — the use of activated charcoal to darken nutrient media and the adoption of liquid culture environments for part of the process — are examined in detail. In addition, an unusual US patent claiming invention of ‘a method for rapidly reproducing orchids’, especially cattleyas, is analyzed. The origin of the micropropagation process claimed in this patent, said by the nominal inventor to go back as far as 1950, is discussed, but the claim remains unsubstantiated. Finally, consideration is given to the problems of adjudicating unequivocal priority for ‘discovery’ of a process as complicated and as broad as micropropagation.”
You can read the entire article here. There is a download article on that page which lets your read the entire article and not just the abstract.
Exceptions: Every rule has an exception, at least that’s what I learned about Portuguese grammar. There is only one orchid that I know of that has had success in growing with the leaf method: the Jewel Orchid. This orchid, most commonly called the Ludisia orchid, is a terrestrial orchid and behaves more like a succulent than an orchid.
Maybe this is why it can be grown with only a leaf… Not sure.
Valid Method: Propagating Orchids from a Stem
Dendrobiums orchids are the best candidates for this method. If you have an old stem that doesn’t produce any more flowers, it can be removed from the orchid and potted by itself.
This method is very similar to the back bulb potting method, but just has a different name.
The non-productive stem is removed (cane) and is placed in a shallow dish, called a rooting tray, with sphagnum moss. Then the entire pot is covered or sealed and placed in a low-light place with abundant heat.
Many times, a heating pad will be necessary to recreate the temperatures of 68° and 85° F and 65° to 75° F at night (20° to 29° C during the day 18° to 24 C) . I use this one (Affiliate Link) but it isn’t the best. In this article I explained what to look for in heating pads.
The only difference in this method (that I could find) is that it is not sprayed daily. In fact, it is only opened once every week to see if new growth has occurred. Several authors suggested using products that stimulate roots, such as a high nitrogen fertilizer, or root stimulator.
Don’t Stop Learning!
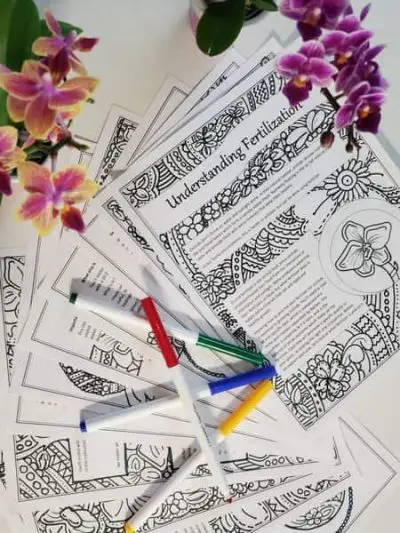
If you want to be included in more information and get a 14-page fertilization guide, please sign up for my newsletter. I don’t spam, but send emails out bi-monthly with some curious topics of interest. If you want more information, click here to go to a specific page on this website where I explain it more in detail.
Also, if you are looking for an orchid journal to keep your notes specifically about orchid care, check out my 2 solutions for that on this page. If note-keeping isn’t your thing, then there is a free excel spreadsheet that you can download. Click here for more information on how to do that.
If you subscribe to my newsletter, I will send you a 14-page guide on the main tips of orchid fertilizer. It is downloadable and you can print it out on your computer. I designed the guide to double up as a coloring book, just to make it fun.
In all, I hope you find a method to make cuttings of your orchid and share them with friends. However you decide to do it, know that some methods are more trial and error than pure science. Some cuttings grow well and others do not.
Happy Cultivating!

Hi. I want to share with you that I am successfully propagating a keiki on a Phalaenopsis stem/spike that has been cut, wrapped in wet spagnhum moss, and sealed in a glass jar. I tried this with 8 spikes–all with at least 3 nodes, as shown in YouTube videos–and all have died/rotted but one. The secret, I believe, is that this particular spike had a very green “cover” over the node. (I don’t know the exact word for the thickened part over a node). This thick part eventually expanded into a slightly larger piece, about 3/4″. I waited to see if anything would happen–would the cut spike rot, as all the others had done? After 3 months I noticed the green “wrap” began to look more like a leaf. I waited longer. Now it is about 5 months and I noticed what appears to be a teeny tiny keiki emerging from the inner part of the leaf/node. The spike is still healthy and apparently feeding the keiki. I can send a photo if you would like. I would no rely upon this method of propagating a Phalaenopsis, but still, given the right conditions, it does work.
I would like to find a way to propagate a 6 ft. Asian Lilly.
You can propagate phalaenopsis orchids from flower spike cuttings. I have done it multiple times. Even if the spike has not produced a keiki first, you can cut the spike off the plant, keep it in a humid environment, give it mild light and foliar fertilizer, and it will grow leaves and eventually roots from a node. The success rate is generally low, but it can be done. The American Orchid Society has articles about this on their website. Also, some species like the Florida ghost orchid can be propagated by root cuttings.