
If this is your first time repotting an orchid, it’s great that you looked for information. Being knowledgeable in what you’re doing is already winning half the battle. Once you repot an orchid a few times, you’ll see it’s not that hard. Soon you’ll get into a routine, and the steps will come naturally.
What is going to be covered in this Guide:
When is the best time to repot an orchid
Visual Hints it’s time
How long will Repotting Take?
Choosing the right Pot
What potting mix is used to repot
Materials needed
Sterilization
7 Step How-To Guide For Repotting
Epiphytic and Terrestrial Orchids
Caring for your Repotted Orchid
When is the best time to repot an orchid?
The first thing you’ll want to do is verify if your orchid needs repotting. After all the blooms have shriveled up and fallen off the flower spike is the perfect time for a repot.
Don’t wait too long, since after a quick dormancy period, new roots will start to grow.
If new roots have been growing for some time, it’s risky to repot, since they have already adapted to the medium they are in. Some literature says repot every spring. I disagree. There are many types, varieties, species, and assuming one specific time slot to repot all your orchids is putting them at risk. Some orchids bloom twice a year (you won’t be repotting twice, even if they bloom 2x) and others are “just winter” or “just summer” bloomers. To force all your orchids to repot at the same time whether they need it or not, is placing your needs above your orchids: not good.
DON’T repot your orchid when it is in full bloom. The orchid has already spent its energy to produce the bloom, and is on its way to dormancy. It has no extra supply to provide in terms of nutrients, and repotting is definitely a strain. The extra stress may cause blossom blast or bud blast, when all the flowers/buds shrivel up and fall off before opening.
I must add that orchids HATE to be repotted. It’s like going through mid-life crisis every two years. They like where they are and don’t like to be bothered. In nature, when they attach themselves on trees, those roots are clung to that bark for life.
They like it that way: peace and tranquility. Imagine packing up and moving every two years to a new country: new cultures, new customs, new traditions, and a new house. Military and missionary life-styles can relate well.
Yeah, so just don’t repot it until it’s an absolute necessity.
What Visual Cues Will Your Orchid Give You it’s Time to Repot?
You’re orchid will also give you some visual cues that it’s fed up with its current pot. What hints are these? (1) Roots will be pushing on the exterior of the pot, trying to bust through. If you see roots (not areal roots) overflowing from the sides of the pot, then you need a bigger pot.
Orchid roots naturally grow outward, searching for the sides of the pot. This is why the middle of the medium is pretty “rootless”, while toward the sides of the pot, the roots circle around in various waves.
If the pot is too small, these roots cram each other, preventing good airflow and space. They can’t push out anymore, and won’t absorb the nutrients or water. The automatic result is either root rot or a wilting orchid.
(2) Another sign that your orchid is ready to repot is the time it takes to water. If during watering. If the water takes forever to drain out the bottom holes, your potting medium has broken down.
Firm potting medium, like bark and good quality sphagnum, allows air to flow through it and enough space for gas exchange. Now, after it has degraded, the potting medium has an appearance of small, dust-like powder that crumbles when you push down on it.
Sphagnum is the worst in terms of quick decomposition. A good quality sphagnum will last up to 2.5 years, but normally start to decompose around 1.8 years. What was used to provide humidity and keep the medium fresh, doesn’t hold up, thinning down like an old sponge.
Most orchids you buy from garden centers and supermarkets will be potted in sphagnum moss only. They’ll be a sphagnum ball held in a plastic-mold, similar to a cup. When unpotting, look for a small plastic cup that sits directly under the roots.
How Long will Repotting Take?
Find a slot of 30 minutes to focus on repotting, since you never know exactly what you’ll face to release the orchid from it’s current pot. I hardly take more than 10 minutes, but the first time I repotted, I wanted to do everything right and I was really nervous (for some odd reason), so it took me twice the time.
What Potting Medium is the Best to Choose?
Most orchids will grow on trees (epiphytes) and aren’t terrestrial. If you’re repotting a terrestrial orchid, please jump this guide and read the very end, where the repotting method will be different.
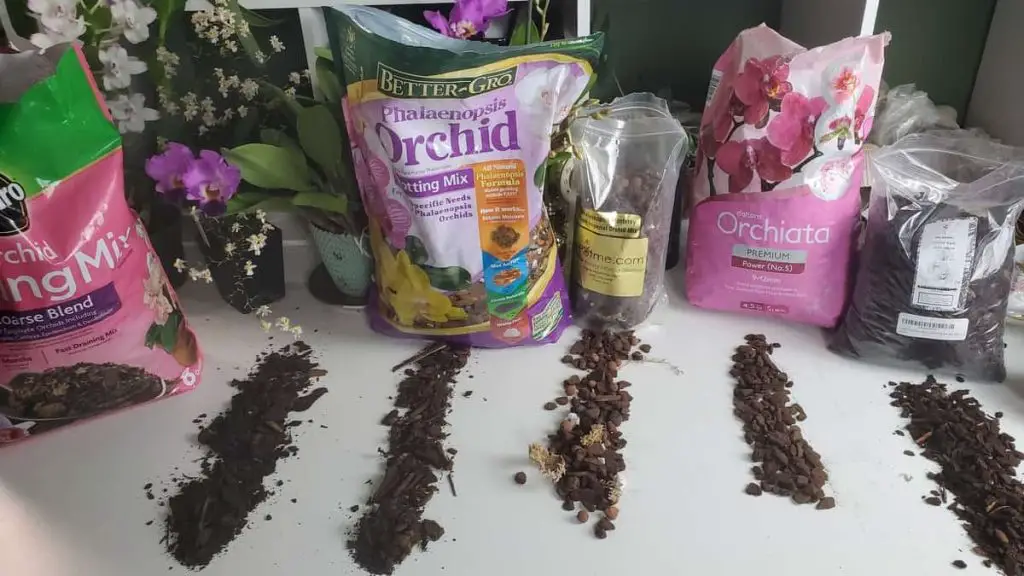
For an epiphyte orchid, you’ll need a potting medium that will give your orchid roots adequate air circulation and stability. There are several different potting mediums that your can use, and even try semi-hydroponics or full hydroponics. If you are serious about growing several types of orchids, my suggestion is to buy three orchids, and repot each one in a different medium.
It’s too easy for most guides to say: repot with bark. Use sphagnum. Don’t add charcoal. (I always use charcoal, by the way.) Each orchid genus and species are different. The size and age of the plant also makes a difference. Maybe you have a miniature Phalaenopsis, and are following a guide that is made for Phals. They’ll be different methods and potting mediums. So beware of guides that use “an all for one” guide.
Another thing that differs is your specific life style. When do you water ? How often? Will the orchids be mounted? Are they in a vivarium? How is the humidity where you are keeping them? What’s the air circulation like?
All these answers will differ according to your daily routine and environment.
Pick the Right Potting Medium
- Age of Plant
- Size of Roots
- Your Watering Routine
- What Kind of Pot
They’re some general guidelines, though:
(1) Pick the potting medium according to the size of the roots. Baby orchids with tiny, fine, delicate roots will need a fine-grade bark, but can preferably grow only in sphagnum. Large-rooted orchids, like Vandas, have thick, wood-like, hard-textured roots. They’re hard to bend (which is why most people grow Vandas in hanging baskets) and need a thick, large-grade bark.
(2) Add Sphagnum if your orchid likes humidity or is less drought-resistant. Most monodopidial orchids, like Phalaenopsis, need to be watered more frequently. They also need to be thoroughly dried out before watering again. Sympodial orchids, like Cattleyas, have pseudobulbs which store water. These will prefer to be watered less, but don’t mind a more humid pot. So find out what kind of orchid you have and water accordingly.
(3) Add Charcoal. If you want to know why, this article explains all the pros and cons of charcoal. I add charcoal to all my pots, and have seen wonderful results. You can find charcoal in big chunks for thicker rooted orchids, and tiny bits, more suited for smaller, thinner roots.
If you still can’t decide, try reading this article about various potting mediums. I go into more detail about the many different materials that can be used and which is better for each orchid.
Which Pot to Pick for Repotting?
Most orchids need to be repotted every two-three years. If your orchid is sympodial, like a cattleya, you need to measure one pseudobulb for each year, and add that space to the pot. In Monopodial orchids, like Phalaenopsis, you’ll need to add 1 to 2 inches to the pot you have now (1.5 to 3 cm.)
DO NOT BE TEMPTED TO REPOT IN A HUGE VASE.
This is a big one for new orchid growers. All other household plants can do fine a vase three times the plant’s size. That just means less work for you in the long run, and more time in between repotting.
The same isn’t true for orchids.
Orchids like to feel secure, and hugged by their pots. In nature, when they firmly attach themselves to tree bark, they don’t move, wiggle, or sway in the wind. The roots stay put—immobile.
In a pot, the roots will look for the hard surface of the pot to cling to. If you repot in a vase that is too big, the orchid will need extra energy to search for the sides of the pot, resulting in aborting the blooming period. If it can’t find stability, it won’t produce a flower spike. So keep the pot a little bit bigger, but not much: 1 to 2 inches (2 to 5 cm) is fine.
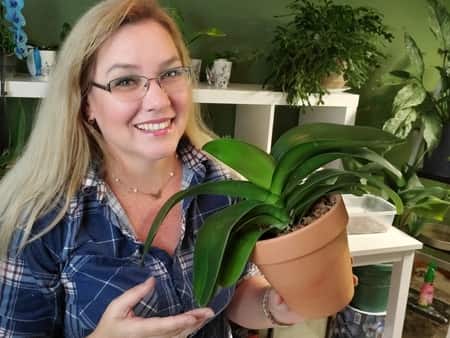
As for plastic, ceramic, terracota, glass, mounted wood, or open baskets… This is mainly up to you. There are pros and cons of each of these methods which you can read here if you want more ideas. Since I already mentioned all that there, I won’t repeat it again in this article.
What Material Will I Need to Repot an Orchid?
The materials you use to repot your orchid are not that hard to find. All these things can be reused form one orchid to the next, but only after soaking, washing, scrubbing, sterilizing and all the “hospital protocol” you’d used to treat a high-risk, contaminating, viral infection.
Orchids are one of the plants that microorganisms love to plague. With an open cut, viruses can infect a plant, rapidly killing it. Bacteria can spread form one pot to another if it isn’t properly scrubbed out with soap and water. Since we are on this topic, you might want to pour boiling water over your bark and let it cool overnight. I know it’s a bit extreme, but you have to soak it anyways…so why not?
MATERIALS
- A pot with side holes to provide air circulation and good drainage
- Scissors/Razor Balde/Knife… whatever it is, make sure it’s sterilized
- Something to keep your surface clean: newspaper, plastic, a bucket…
- Potting Medium
- Rubbing Alcohol, Bleach, or a flame to Sterilize Equipment
- Cinnamon (optional)
- A Plant Label or Name Tag (optional)
- Charcoal (optional)
- Fertilizer (optional)
Preparing Your Potting Material for Repotting
Sphagnum moss needs to be soaked overnight before using. It comes in a bag where it has probably been sitting on a store shelf for months. To become a useful media for your orchid, it needs to re-hydrate.
If you place the sphagnum straight out of the bag and into the potting media, it won’t absorb the water it needs to and your orchid could dehydrate. Since you have to soak it anyway, use boiling water. This kills any bacteria, as mentioned before.
If you don’t have the time to soak your sphagnum moss overnight, the bare minimum is 20 minutes. The longer the better, but we know life has its crazy days. If you absolutely can’t get it soaked for longer, water your orchid a lot more in the first few days, since the sphagnum will be doing poorly as an absorbent.
It’s Finally Time to Repot
1. Remove the Old Pot
The first thing you’ll need to do it remove the orchid from its old pot. Depending on how much the roots have attached themselves to the pot, this can be an easy process or hard one.
If your pot is plastic, you can squeeze it a few times to loosen the roots before you pull it out. If it still isn’t coming out, soak the orchid medium in warm water (never hot water) and try again.
In this part, you’ll have to use some force, but be careful enough o not yank or tug on the roots.
The roots are covered in a one-layered cell structure called velamen, which helps absorb water and nutrients. Velamen is in fact dead tissue, but it provides extra surface area for absorption.
What you don’t ever want to destroy are the thread like strings inside the velamen, which is, per se, the actual root. Even if a part of the velamen sticks to the pot, don’t fret. Just take extreme care of the root.
2. Remove old Potting Medium
Once your orchid is out of the pot, you’ll need to remove all the old potting medium. If this is only compacted sphagnum, it could take quite a while to dig out. Keep turning the orchid and working in small pieces and chunks, never tugging too hard.
Lecca (or clay) pebbles can be a pain to repot if the roots have attached firmly to them. Usually, pebbles are the easiest to remove, but if the roots have been in the same potting medium for too long, it can be quite a task. The porous surface of the pebbles provides the perfect adherence to the velamen.
Just take your time and go slow.
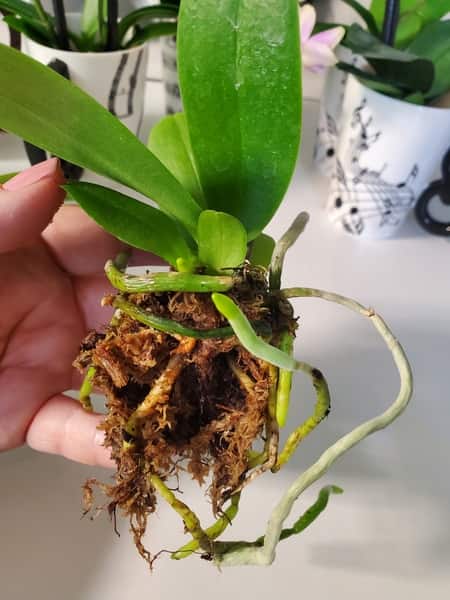
3. Wash the Roots and Examine Carefully
You’ll want to examine your orchid for any insects, fungus, bacteria, white spots, brown spots, hairy web-like substances and all the like. Look over your orchid well, and sometimes, due to the old potting medium, it’s a good idea to rinse the roots in the sink to remove all the potential let over potting medium that has broken down into fine dust.
If you are trying the hydroponics (grown in water) then read this article first. After you’ve read it, rinse the roots again. And again. And again. Any old potting medium on the roots will decay and decompose in the water and cause the roots to rot.
4. Trim Old, Dead Roots
Now is the time to cut away all the dead roots. Squeeze the roots. They should be firm and not squishy. Brownish-black roots need to be removed. They won’t recover and just contaminate your soil.
Don’t be shy about this part. Orchids can survive on very little root system, but that is better than keeping a rotting rot in your potting media for another two years.
Before you do this, sterilize your instruments. Never, never, never use scissors that are dirty.
Wipe them off in rubbing alcohol or use a flame to heat them. Keep the flame on for more than just a swipe or two. That doesn’t kill anything. Slowly move the flame back and forth for at least 10 seconds on each side of the scissor blade. One of the easiest ways to introduce a virus is through cutting leaves and roots with an unsterilized tool.
Once the roots are all nice, yellow to green colored and firm, you are ready to find this orchid it’s new home.
If you want to, you can also pull away thin sheaths that are dead (if you have a dendrobium, for example). This is the time to give this orchid a makeover, but make sure all the stuff you pull away is in fact dead.If you are using bark, leca, sphagnum, perlite, alifor, charcoal… any of these except soil, then mix your substrate well and place it into the bottom of the pot. Place your orchid into the pot where the bottom of the stem is level with the rim of the pot. Hold the orchid in place and fill in the potting medium around the sides carefully to fill any holes.
5. Differentiating between Sympodial and Monopodial Orchids
If you are repotting a monopodial orchid, (one that only has one stem and the flowers sprout form the middle of the orchid, like a Phalaenopsis Orchid) place the stem in the middle of the pot. It should have room for the roots to grow out in all directions.
If you are repotting a Cattleya or any other Sympodial orchid place the rhizome and pseudobulbs toward the side of the pot, where the newer growth is pointed toward the middle. The rhizome should be no more than one inch (2.5 cm) under the top of the potting medium, preferably half-an-inch (1.3 cm). Each year the sympodial orchids will produce a new pseudobulb.
The oldest should be the smallest, closest to the outside of the pot.
The new growths should be encouraged to sprout toward the middle of the pot.
If you aren’t sure about what type of orchid you have, there are some good tips in this article about Orchid Anatomy and Terminology.
If that still didn’t help, I suggest you take a look at my Pinterest Page , since I’ve gathered over 200 pictures of different types of orchids, divided into categories of genus and species.
I always thought (and still think) pictures helped more than words.This is just one example of our Tutorial Pins on Pinterest. Click on the picture for more, including pictures of mounted orchids.
6. Fixating your Orchid in the pot
Your orchid need to be firm inside the pot, without shaking, moving, flopping over to one side, or unstable. You need to press the substrate (potting medium) firmly into the pot, so you will be able to lift the pot by it’s leaves, and the orchid will not come out.
Don’t over compact the substrate, especially if you are using sphagnum moss. Keep it airy, but tight. Not compact but sturdy. You’ll get the hang of it the more you do it.
Don’t bury the stem. The stem is not a root and should stay away from the potting medium. The rhizome, on the other hand, needs to be under the potting medium.
7. Water While You Check For Good Drainage
It’s the final test to see if your potting medium is draining well before you check it off the list. Take your orchid to the sink and see how long it takes water to exit the pot in the bottom. Water should drain quite fast and thoroughly. If you see water building up and not exiting, you have a problem.
Don’t Stop Learning!
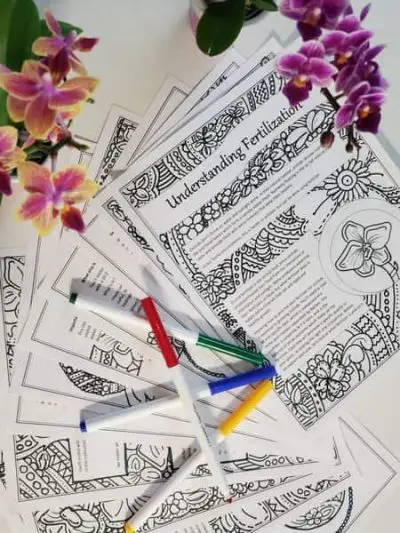
If you want to be included in more information and get a 14-page fertilization guide, please sign up for my newsletter. I don’t spam, but send emails out bi-monthly with some curious topics of interest. If you want more information, click here to go to a specific page on this website where I explain it more in detail.
Also, if you are looking for an orchid journal to keep your notes specifically about orchid care, check out my 2 solutions for that on this page. If note-keeping isn’t your thing, then there is a free excel spreadsheet that you can download. Click here for more information on how to do that.
If you subscribe to my newsletter, I will send you a 14-page guide on the main tips of orchid fertilizer. It is downloadable and you can print it out on your computer. I designed the guide to double up as a coloring book, just to make it fun.
Caring for your Repotted Orchid
To cause the least stress possible, place the orchid back in the same place it was before. Preferably, with the leaves facing the same way. Many times, we turn the orchid vase around to better see it, but don’t realize the stress it’s causing.
Imagine you are going to the beach and have put sunscreen on all over the top of your arms and legs. As you baste in the sun, tummy facing the sky, think about what parts of your body are not getting sun: the inside of your arms and inside of your legs. These areas hardly ever get sun.
Now imagine raising your arms over your head as your lay in the sun, not having placed sunscreen on those areas. Your arms will most definitely burn. You’ll be so sore that you won’t be able to move.
The same happens with an orchid.
It’s used to getting sun form one position, and has developed enough red pigment (it’s natural sunscreen) to deal with those kinds of rays. After a repot, it will have to adjust again to a different setting. If you turn it around, thinking it will grow rounder and fuller (like we do to houseplants to get that full circular shape and promote leaf growth in all directions,) just don’t. Please don’t.
Keep the orchid in the same direction it was before. It was happy there. It’s like going back to your hometown after a few years of living away. Give your orchid that pleasure of being home after a stressful event, where it can relax and recuperate before growing new roots.
Now that you have read all about repotting, it’s time to give it a try. Leave a question, comment or a high-five in the comments below.
Happy Cultivating!

Ik kan niet vinden wat ik kan doen met mijn orchidee, hij heeft slappe bladeren 🍁 en slappe bloemen 🌺 en volgens mij ziet de binnenkant van de kroon er ook slap uit. De wortels zien er verkleurd uit ( sommige). Ikben een beginner en weet niet wat ik moet doen om mijn mooie orchidee te redden.
Graag advies. B.V.D. Groetjes uit Nederland 🇳🇱
Hallo Englenia,
Omdat de bladeren slap zijn, is deze waarschijnlijk uitgedroogd. Als je water hebt gekregen zoals het moet worden bewaterd, zijn de wortels mogelijk in kritieke toestand. In dit geval zou ik verpotten om de wortels te controleren.
-Amanda
Great series of articles to help me care for my first orchid since I realized wilted blooms don’t mean that the plant is dying. I’ve come a long way on my houseplant journey, but orchid maintenance is new to me. I just noticed a new flower spike (not Arial root, lots of them), so I figured it might be a good time to learn a thing or two.
Your article mentioned not to rotate the orchid because it likes the way it was and minimizing stress is key. My moth orchid is really leaning towards the window, so I figured I should Rotate it (I also realized I need to repot it among other things). Can I Rotate it after some time in the new pot/potting medium to help with the leaning? It’s stem is pretty firmly growing off to the side now, with new leaves.
Thank you!
I tried to repot my orchid in leca. It almost has died. I would like to redo it in bark. It has 1 viable leaf and 1 brand new tiny leaf. I see one green root. I’m afraid it’s going to die. Most of the leaves turned dark and leathery and then fell off. Can I replant it to save it? It’s a phal.